Pro Tips
**Chef's Tips & Troubleshooting:**
- Let the dough rise in a warm, draft-free spot until it doubles in size for the fluffiest texture.
- Brush the tops with butter or egg wash before baking for a golden, glossy crust.
- Use a kitchen thermometer to maintain oil or oven temperature for consistent results.
- Add a pinch of salt to sweet dessert mixtures to balance and enhance the sweetness.
Cooking Tips
Let the dessert cool completely before slicing or serving — many Filipino sweets set and develop their best texture as they rest. Use fresh coconut milk (gata) when available rather than canned. The natural sweetness and rich consistency make a noticeable difference. Have all your ingredients prepped and measured before you start cooking — quick dishes leave no time for chopping mid-recipe.
Ingredient Substitutions
Short on time? A pressure cooker (Instant Pot) can reduce cooking time by roughly half for most braised and stewed Filipino dishes. Reduce liquid slightly since less evaporates.
Storage & Reheating
Store in an airtight container in the refrigerator for up to 3–4 days. The flavors often deepen overnight, making leftovers even more delicious. Store desserts in a sealed container at room temperature for up to 2 days, or refrigerate for up to a week. Let chilled desserts come to room temperature before serving for the best texture and flavor. Reheat on the stovetop over medium-low heat, adding a splash of water or broth if the sauce has thickened during storage. Microwave in 30-second bursts, stirring between each.
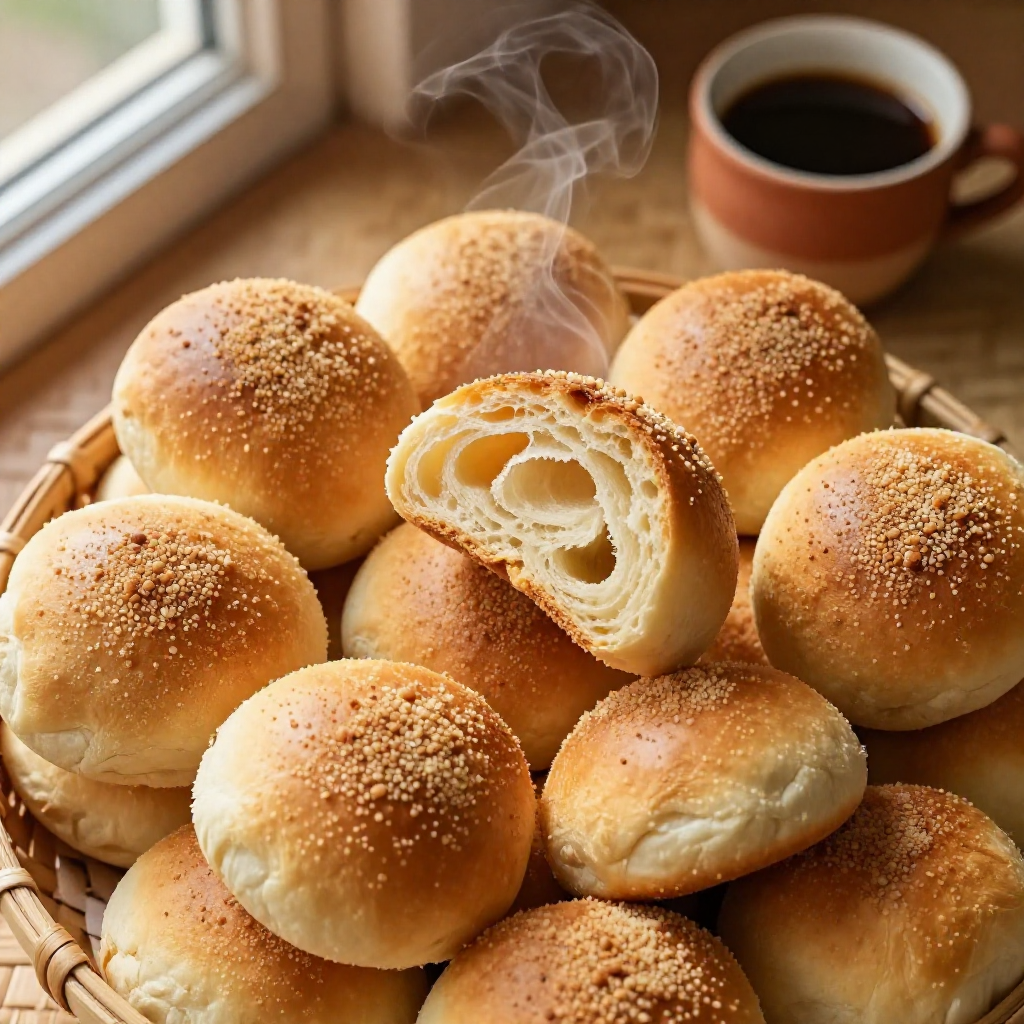
Pandesal
Made with all purpose flour, bread flour, white sugar and butter — a sweet pandesal treat that's perfect for merienda or dessert.
Instructions
- Combine the yeast, 2 tablespoons sugar, and warm milk and stir until the yeast and sugar are fully dissolved
- In the mixing bowl, combine the dry ingredients starting with the flour then the remaining sugar, salt, and baking powder . Mix well by stirring
- Add the egg, butter, cooking oil, and yeast-sugar-milk mixture in the mixing bowl with the dry ingredients then mix again until a dough is formed. Use your clean hands to effectively mix the ingredients.
- In a flat surface, knead the dough until the texture becomes fine. For faster and easier kneading, you may use a Stand Mixer with dough hook.
- Mold the dough until shape becomes round then put back in the mixing bowl. Cover the mixing bowl with damp cloth and let the dough rise for at least 1 hour
- Put the dough back to the flat surface and divide into 4 equal parts using a dough slicer
- Roll each part until it forms a cylindrical shape
- Slice the cylindrical dough diagonally (These slices will be the individual pieces of the pandesal)
- Roll the sliced dough over the breadcrumbs and place in a baking tray with wax paper (makes sure to provide gaps between dough as this will rise later on)
- Leave the sliced dough with breadcrumbs in the tray for another 10 to 15 minutes to rise
- Pre-heat the oven at 375 degrees Fahrenheit for 10 minutes
- Put the tray with dough in the oven and bake for 15 minutes
- Turn off the oven and remove the freshly baked pandesal.
- Serve hot.
Kitchen Tools We Recommend
Cook Pandesal the easy way with the right tools. Shop our favorite kitchen essentials on Amazon — from reliable pots and pans to measuring tools that make Filipino cooking simpler.
🔥 Trending on Amazon right now — these products are selling fast. Check out what's climbing the charts.
As an Amazon Associate, I earn from qualifying purchases.
Pro Tips & Troubleshooting
- Let the dough rise in a warm, draft-free spot until it doubles in size for the fluffiest texture.
- Brush the tops with butter or egg wash before baking for a golden, glossy crust.
- Use a kitchen thermometer to maintain oil or oven temperature for consistent results.
- Add a pinch of salt to sweet dessert mixtures to balance and enhance the sweetness.
Cooking Tips
Use fresh coconut milk (gata) when available rather than canned. The natural sweetness and rich consistency make a noticeable difference.
Have all your ingredients prepped and measured before you start cooking — quick dishes leave no time for chopping mid-recipe.
Substitutions
Storage & Reheating
Store desserts in a sealed container at room temperature for up to 2 days, or refrigerate for up to a week. Let chilled desserts come to room temperature before serving for the best texture and flavor.
Reheat on the stovetop over medium-low heat, adding a splash of water or broth if the sauce has thickened during storage. Microwave in 30-second bursts, stirring between each.

Comments (0)
Leave a comment