Pro Tips
**Chef's Tips & Troubleshooting:**
- Make sure the pan and oil are hot before adding ingredients for the best sear.
- Fry in batches to avoid overcrowding — lowering the temperature makes food greasy.
- For fried fish, score the skin lightly so the heat penetrates evenly and prevents curling.
- Remove the vein from shrimp with a toothpick for a cleaner presentation and texture.
Cooking Tips
Seafood cooks quickly — remove it from heat the moment it turns opaque and flakes easily with a fork. Overcooking makes it tough and rubbery. Pat shellfish dry before adding to the pan so they sear rather than steam. A hot, quick cook preserves their natural sweetness. Have all your ingredients prepped and measured before you start cooking — quick dishes leave no time for chopping mid-recipe.
Ingredient Substitutions
Out of cane vinegar? White vinegar, apple cider vinegar, or rice vinegar all work — each brings its own subtle character. Avoid balsamic (too sweet) or distilled white (too harsh). Lemon or calamansi juice can replace vinegar in most marinades and braises. Add a pinch of sugar to balance the acidity. Short on time? A pressure cooker (Instant Pot) can reduce cooking time by roughly half for most braised and stewed Filipino dishes. Reduce liquid slightly since less evaporates.
Storage & Reheating
Store in an airtight container in the refrigerator for up to 3–4 days. The flavors often deepen overnight, making leftovers even more delicious. Seafood dishes are best consumed within 1–2 days. Reheat gently — microwave on low power or warm in a covered skillet over low heat to avoid overcooking. Do not refreeze thawed seafood dishes. Once reheated, consume immediately and do not re-refrigerate. Reheat on the stovetop over medium-low heat, adding a splash of water or broth if the sauce has thickened during storage. Microwave in 30-second bursts, stirring between each.
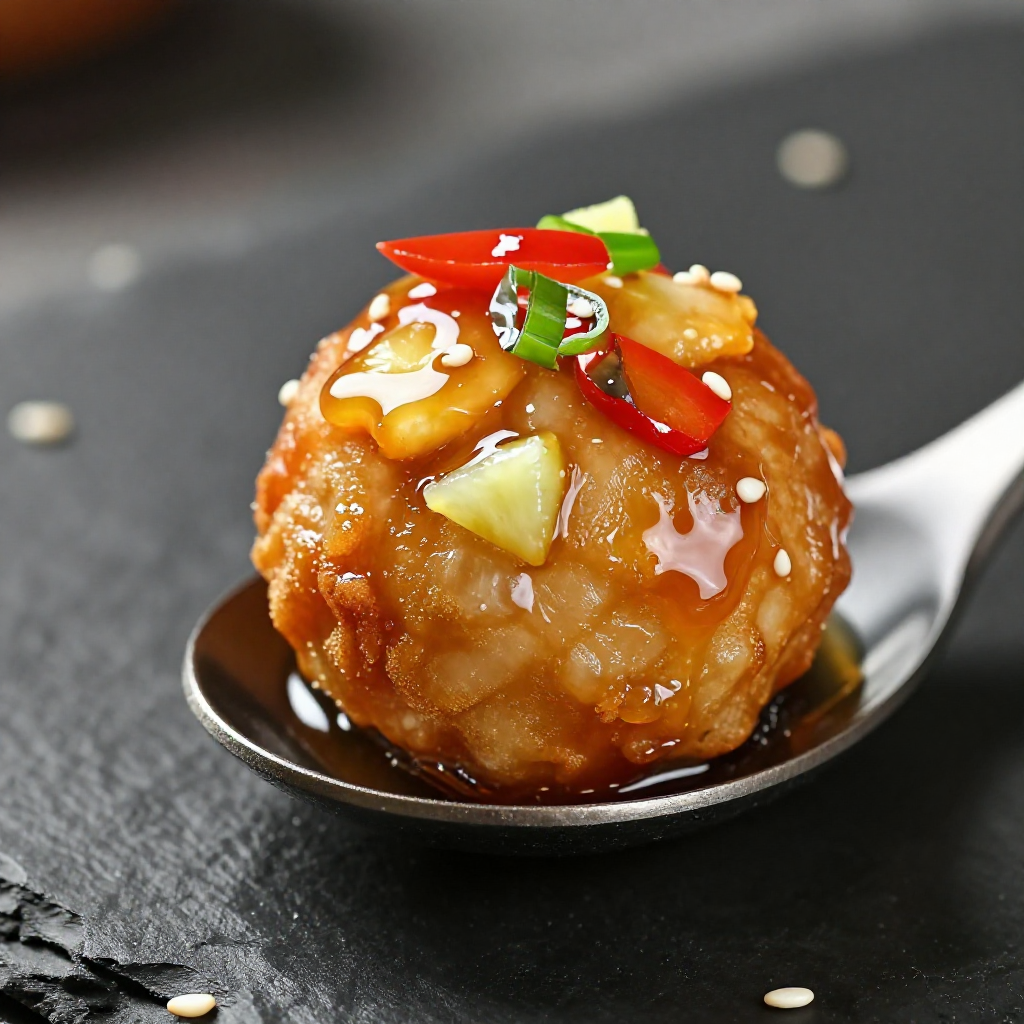
Sardines Fish Ball with Sweet and Sour Sauce
Canned sardines made into balls and then fried to perfection and served with a sweet and sour dipping sauce.
Instructions
- Open the can of the sardines. Separate the fish from the sauce using a kitchen sieve.
- Prepare the sweet and sour sauce by heating the sauce in a saucepan. Add vinegar. Let the mixture boil. Stir and then add sugar. Thicken the sauce by mixing cornstarch and 3 tablespoons water. Pour the mixture into the pot. Stir and cook until the sauce thickens. Set aside.
- Start making the sardine balls by placing the fish (sardines) in a bowl. Mash it and then add the chopped pechay and crack a piece of egg into the bowl. Mix well.
- Add Knorr liquid seasoning and around 3 tablespoons of breadcrumbs. Continue mixing until all ingredients are well blended. Note: add more breadcrumbs if needed.
- Crack the remaining egg and place it in a clean bowl. Beat until smooth. Scoop around 2 tablespoons of sardine mixture and mold it into a sphere. Dip in beaten egg and then roll it over the remaining breadcrumbs.
- Heat oil in a small cooking pot. Deep-fry the sardine balls using low to medium heat until it turns golden brown.
- Remove from the pot and arrange in a serving plate. Serve with sweet and sour sauce.
Kitchen Tools We Recommend
Cook Sardines Fish Ball with Sweet and Sour Sauce the easy way with the right tools. Shop our favorite kitchen essentials on Amazon — from reliable pots and pans to measuring tools that make Filipino cooking simpler.
🔥 Trending on Amazon right now — these products are selling fast. Check out what's climbing the charts.
As an Amazon Associate, I earn from qualifying purchases.
Pro Tips & Troubleshooting
- Make sure the pan and oil are hot before adding ingredients for the best sear.
- Fry in batches to avoid overcrowding — lowering the temperature makes food greasy.
- For fried fish, score the skin lightly so the heat penetrates evenly and prevents curling.
- Remove the vein from shrimp with a toothpick for a cleaner presentation and texture.
Cooking Tips
Pat shellfish dry before adding to the pan so they sear rather than steam. A hot, quick cook preserves their natural sweetness.
Have all your ingredients prepped and measured before you start cooking — quick dishes leave no time for chopping mid-recipe.
Substitutions
Lemon or calamansi juice can replace vinegar in most marinades and braises. Add a pinch of sugar to balance the acidity.
Short on time? A pressure cooker (Instant Pot) can reduce cooking time by roughly half for most braised and stewed Filipino dishes. Reduce liquid slightly since less evaporates.
Storage & Reheating
Seafood dishes are best consumed within 1–2 days. Reheat gently — microwave on low power or warm in a covered skillet over low heat to avoid overcooking.
Do not refreeze thawed seafood dishes. Once reheated, consume immediately and do not re-refrigerate.
Reheat on the stovetop over medium-low heat, adding a splash of water or broth if the sauce has thickened during storage. Microwave in 30-second bursts, stirring between each.
Comments (0)
Leave a comment